Get Your Google Keys
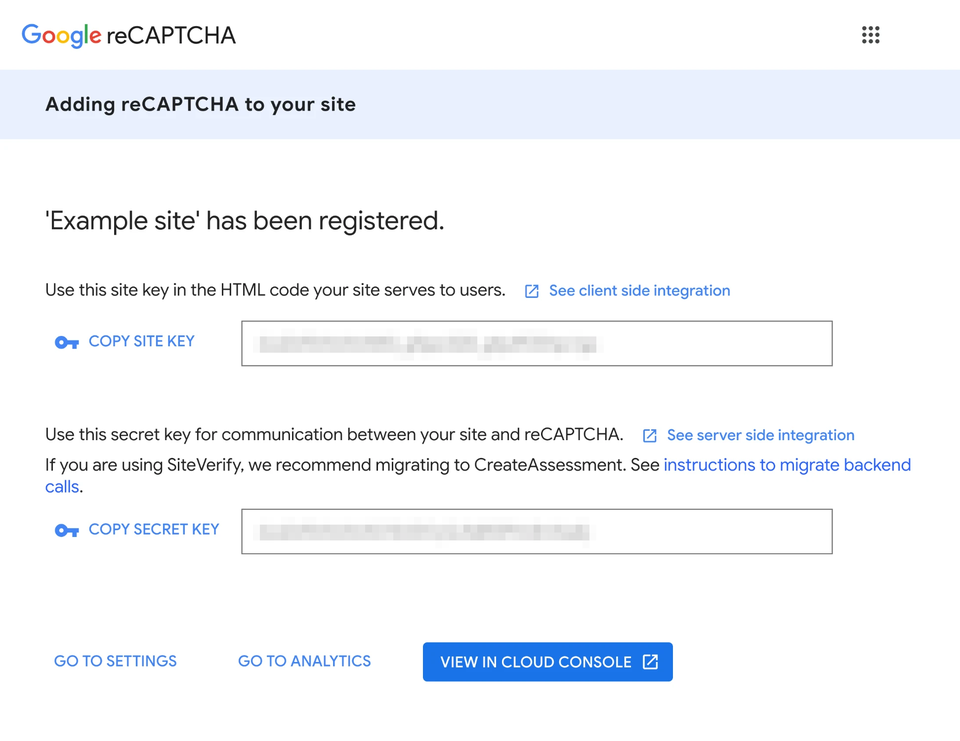
The plugin needs two keys from Google: a Site Key (public) and a Secret Key (private). They are free.
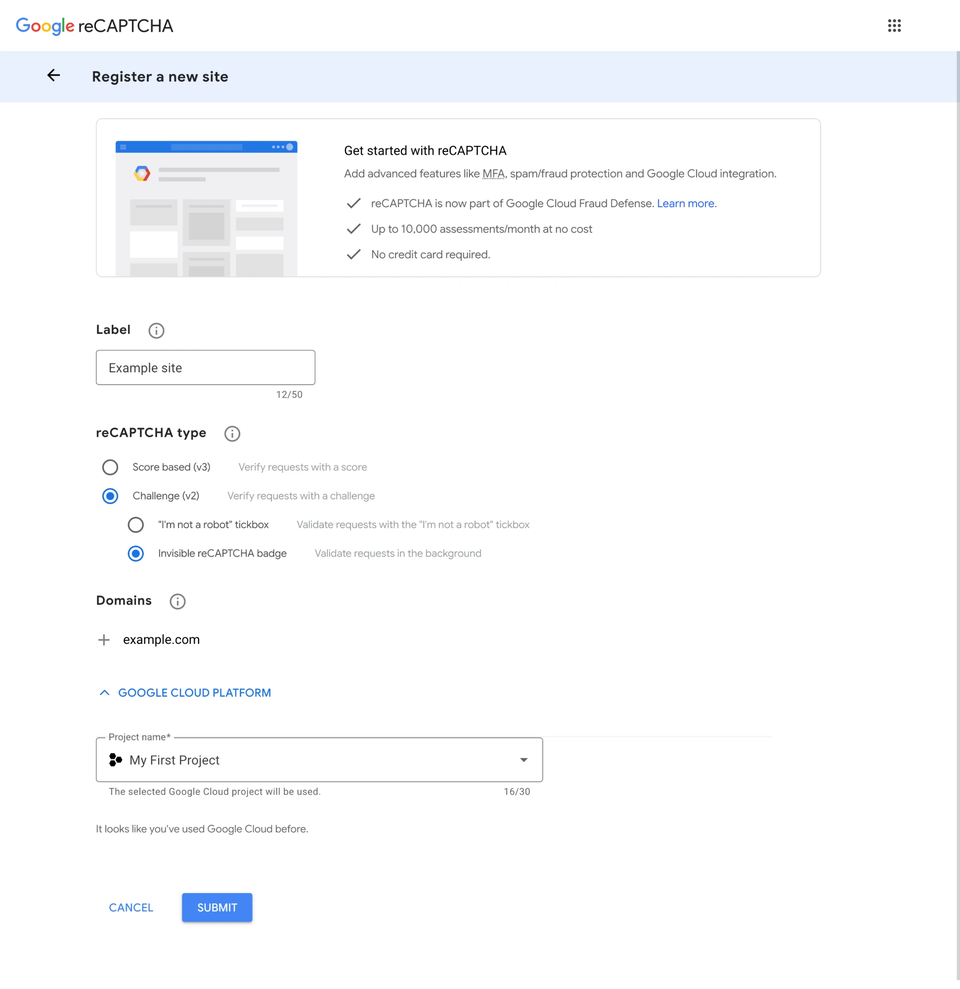
The plugin works with reCAPTCHA v2, Invisible reCAPTCHA badge. Keys of another type, such as v3 or the "I'm not a robot" checkbox, do not work.
Create the keys
- Open the Google reCAPTCHA admin console and sign in with a Google account.
- Give the site a Label you will recognise.
- Under reCAPTCHA type, choose Challenge (v2), then Invisible reCAPTCHA badge.
- Under Domains, add your site's domain.
- Under Google Cloud Platform, check the Project name. Google asks for a Cloud project. A new account gets a default one.
- Click Submit, then copy the Site Key and the Secret Key.
After you submit, Google shows both keys. Copy them from here, or open the site later from the reCAPTCHA admin console.
Google's own guide: Invisible reCAPTCHA.
Test keys for development
Google publishes a pair of reCAPTCHA v2 test keys. You can use them on a local or staging site to check that the plugin loads the script and submits forms.
| Key | Value |
|---|---|
| Site Key | 6LeIxAcTAAAAAJcZVRqyHh71UMIEGNQ_MXjiZKhI |
| Secret Key | 6LeIxAcTAAAAAGG-vFI1TnRWxMZNFuojJ4WifJWe |
Good to know:
- Every check passes. Google says all verification requests pass with these keys. They don't block bots, so they don't protect your site.
- The widget shows a warning. Google adds a message so that the keys are not used on a live site. You will see it in the reCAPTCHA badge.
- Use your own keys on a live site. Replace the test keys before you go live.
Source: Google's reCAPTCHA FAQ.
Add them to WordPress
- Go to BerrySecure → Invisible reCaptcha → Settings.
- Paste the keys into Your Site Key and Your Secret Key.
- Click save.
Details of the other fields: Keys and appearance.
If a form is protected but the keys are missing or wrong, Google can't approve the form. That includes the login form, so you could lock yourself out. See Locked out of the login page.