A Problem to Solve
When reporting on orders in WooCommerce or other ecommerce solutions, the default assumption is often that you want to see data about orders that were placed within a certain period of time (say, the past 30 days). That works great for plenty of applications, like analyzing sales trends or accounting for revenue on an accrual basis. But in some cases, other points in the order lifecycle besides the initial order creation are more important when filtering a set of orders for a report or data export.
In this quick tutorial, we’ll consider one common use case where this applies: delivery dates. If your store offers delivery to customers at selected or predetermined dates and times, or if you have an order pickup option that means you need to have each order ready at a certain time, this is for you! (And if this isn’t relevant for your store, skip to the end to read about a few other applications of alternate date based reporting!)
Gathering the Data
Thanks to WooCommerce’s large audience, for (nearly) every common problem or need, there are a bunch of existing solutions to choose from, often in the form of free or paid third-party plugins. For our delivery date conundrum, we’re going to use the aptly named “Order Delivery Date for WooCommerce” plugin from Tyche Softwares, available as a free lite version on the WordPress.org plugin repository.

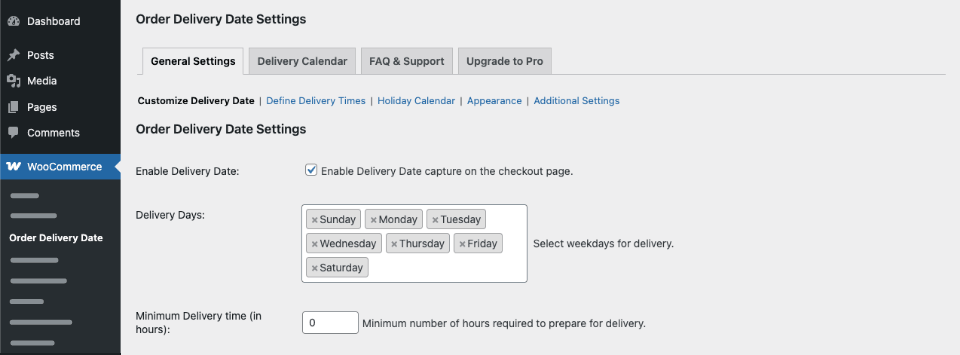
Once installed, it’s just a matter of heading over to WooCommerce > Order Delivery Date in the WordPress admin and checking the box near the top of the General Settings tab to start processing delivery dates on checkout. (Of course, there are a lot of other options you might want to customize to your needs as well!)
Voilà! Once this is set up and tested, you’re all set to start collecting delivery date information on new orders.
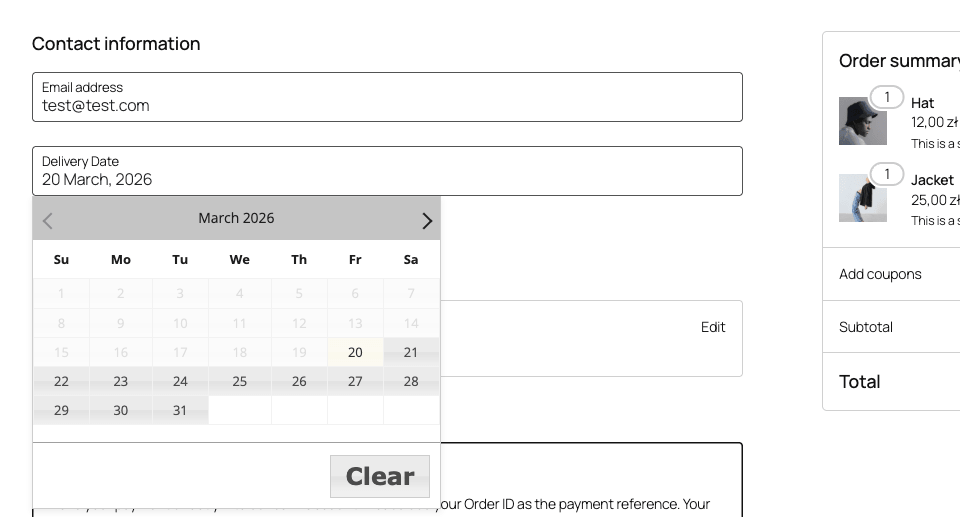
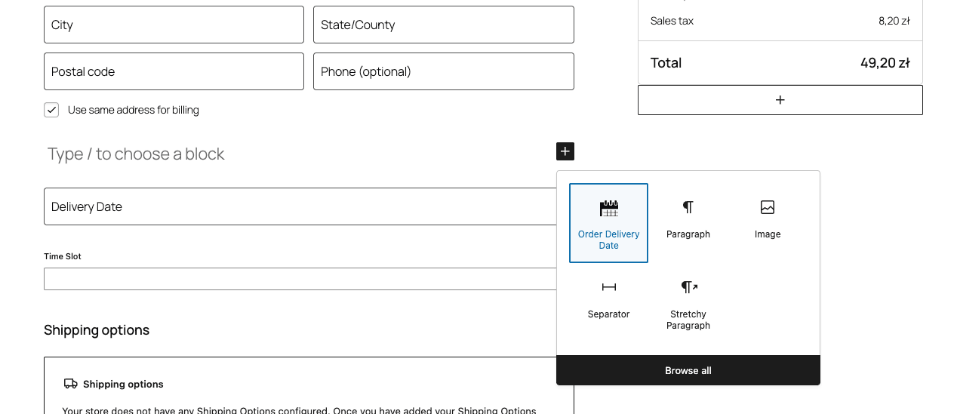
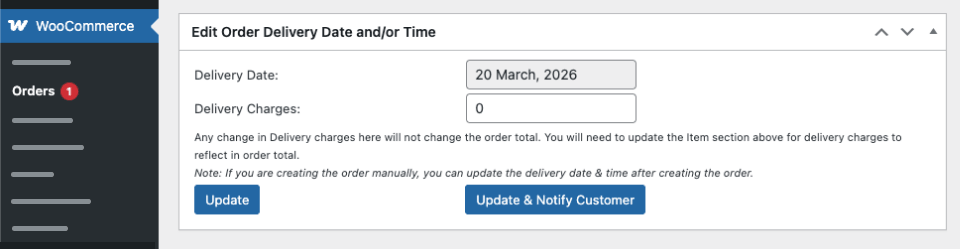
You can also edit delivery dates on existing orders in the admin.

And Putting it to Use!
All the data in the world isn’t very helpful without a way to use or apply it once it’s been collected. Enter Ninjalytics! With its extensive support for custom meta fields, processing data from third party plugins like Order Delivery Date for both reporting and filtering is just the kind of thing this plugin excels at. For our purposes here, we’ll focus on using delivery dates to define a report date range (rather than simply displaying them in an order-date-based report).
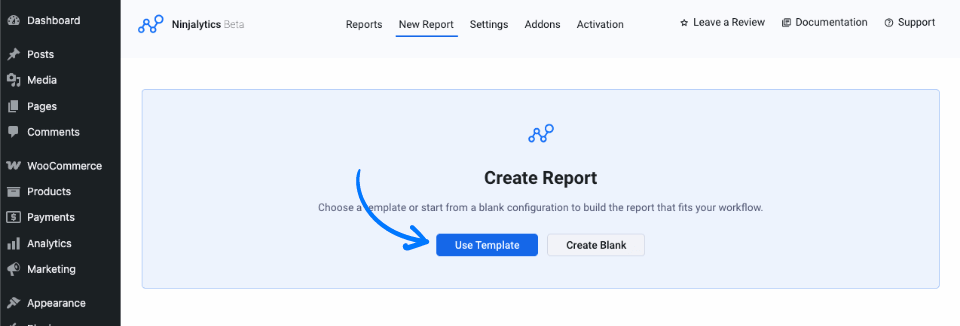
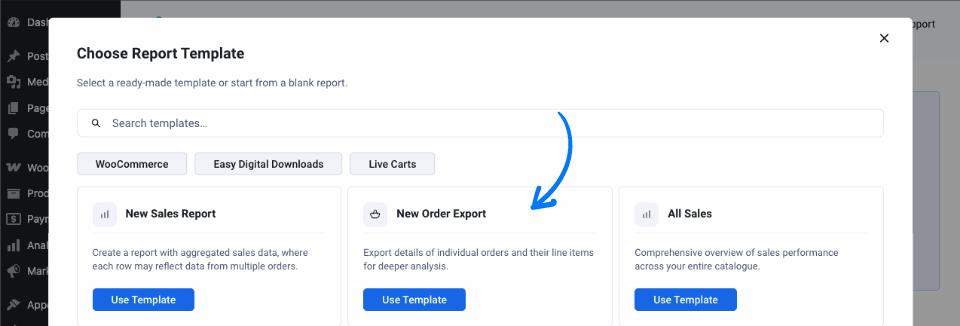
With the premium version of Ninjalytics installed, head over to the Ninjalytics page in the WordPress admin and click the New Report button. Here you’ll need to choose a starting point for your report based on what you need it to do for you. Most likely, you want to see details of individual orders for fulfillment purposes; if that’s true, select the option to use the New Order Export template. Otherwise, if you want to see sales data in aggregate, choose the New Sales Report item instead.
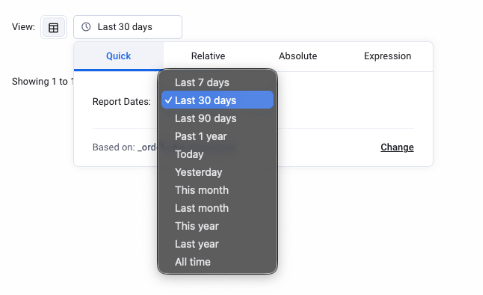
As with any Ninjalytics report, you can customize a plethora of options, including filtering (by order status, product category, meta fields, etc.), report columns, output format, and much more. For now, we’ll use the default configuration which includes some of the most commonly used fields. To see the orders for a specific delivery date or range of dates, click the date field next to the View selector at the top of the report.
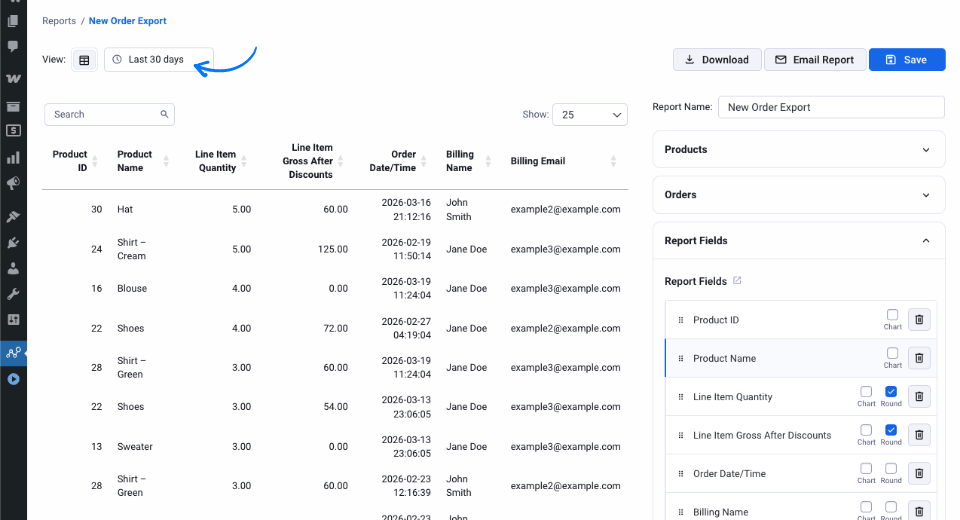
Near the end of the dropdown, you’ll see the default date range basis: “Based on: Order Date” (if you don’t see this, you might be using an outdated version of Ninjalytics, or you have the free version).
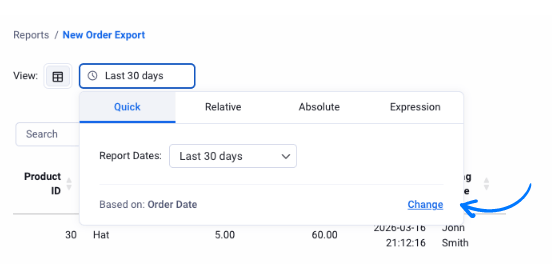
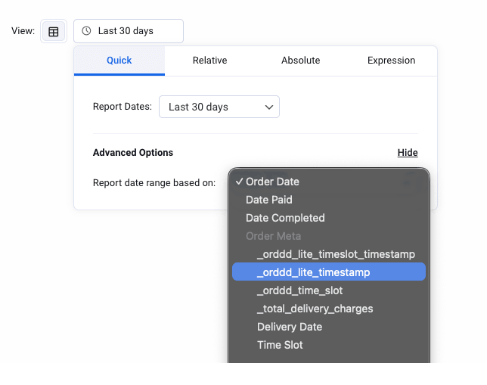
Clicking the Change link lets you select from a bunch of different options for the date range basis. One of these should be the _orddd_lite_timestamp field under the Order Meta heading (you may need at least one order on your site with a delivery date set for the plugin to pick up this meta field).
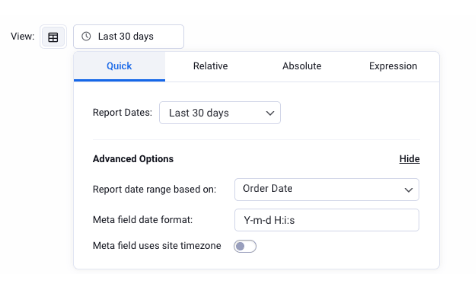
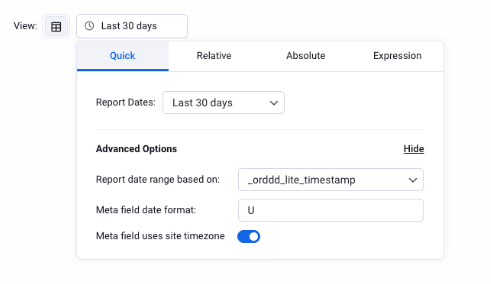
After selecting the _orddd_lite_timestamp meta field, you’ll need to give Ninjalytics some more information about the dates that are stored in this field. First is the date format, which in this case is a numeric timestamp; enter U in the date format field. Next, enable the “Meta field uses site timezone” option to tell Ninjalytics that dates are stored in your local timezone rather than in UTC.
Now you’re all set to report on orders based on delivery date instead of creation date! You can specify the date range you’d like to report on using any of the four date range modes supported by Ninjalytics: Quick, Relative, Absolute, or Expression. For example, to see orders to be delivered today, just select the “Today” option from the dropdown in the Quick tab.
And There’s More (Of Course!)
The usefulness of alternate date range bases in reporting doesn’t stop there. You can also configure the date range to use Date Paid (great if you accept payment methods that are not processed at the same time that the order is placed, and you want to report on cash basis revenue) or Date Completed (see when orders leave your warehouse instead of when they are received – particularly helpful if you have a long lead time between order acceptance and fulfillment).
Ninjalytics is built to play well with other WooCommerce extensions, so the sky is the limit when it comes to applications that involve dates associated with orders. Think event ticketing, appointment scheduling, travel and accommodation booking, and lots more! If your plugin stores its dates in an order meta field in a format that is compatible with PHP’s date functions and string comparison, Ninjalytics should be able to apply your reporting date range to it!
Start reporting by delivery date
Ninjalytics makes it easy to build flexible WooCommerce reports based on delivery dates, custom fields, and other key data.
Learn more about Ninjalytics.
Stay updated
If you’re working with WooCommerce data and custom reporting setups like this, you’ll probably run into similar use cases or edge cases along the way. That’s exactly why we created the BerryPress Facebook community – a place to ask questions, share ideas, and discuss real-world scenarios with other users.
Join the BerryPress community on Facebook
If you’d like to stay informed about new tutorials, features, and updates, you can also subscribe to our newsletter:
Subscribe to our newsletter